Use VS Code for RTL Design with Vivado: A Practical End-to-End Workflow
VS Code can be a strong front end for RTL design when it is paired with Vivado command-line tools and a clear project structure. In this post, I walk through a complete setup for mixed-language FPGA development (VHDL, Verilog, and SystemVerilog), including real-time syntax checks, symbol navigation, simulation, and Vivado project creation from Tcl.
Table of Contents
- Table of Contents
- Why Use VS Code for RTL?
- Project Prerequisites
- 1) Real-Time Syntax Errors in VS Code
- 2) Enable Go To Definition (F12)
- 3) Run Simulation from Makefile
- 4) Create Vivado Project from Tcl
- GitHub Repository:
The Complete SystemVerilog For Digital Design and Synthesis:
- udemy.com/course/systemverilog/?referralCode=34525774A6A4CC9B8A24
- Coupon Code: HELLODIGITAL2
Why Use VS Code for RTL?
Vivado has powerful simulation and synthesis tools, but many engineers (including myself) prefer VS Code for day-to-day editing because it offers:
- Fast navigation and editing.
- Extension-driven linting and feedback.
- Task automation.
- Lightweight project management with plain text files.
The goal is simple: write and inspect RTL in VS Code, run simulation from Make, and still generate a standard Vivado project when needed.
Project Prerequisites
- Xilinx Vivado (tools available in PATH: xvhdl, xvlog, xelab, xsim)
- Visual Studio Code
- Ctags for symbol navigation
- GNU Make for build automation
- Universal CTags
Install and Configure Vivado
- Download Vivado installer from:
https://www.xilinx.com/support/download.html - Install Vivado.
- Add Vivado environment setup to your shell startup file (e.g., .bashrc or .zshrc).
Example for Linux Bash:
source /tools/Xilinx/Vivado/2024.2/settings64.sh
To verify, open a new terminal and run:
vivado -version
xvhdl -version
xvlog -version
xelab -version
xsim  -version
You should see version information for each tool, confirming they are correctly installed and available in your PATH:
vivado v2024.2 (64-bit)
Tool Version Limit: 2024.11
SW Build 5239630 on Fri Nov 08 22:34:34 MST 2024
IP Build 5239520 on Sun Nov 10 16:12:51 MST 2024
SharedData Build 5239561 on Fri Nov 08 14:39:27 MST 2024
Copyright 1986-2022 Xilinx, Inc. All Rights Reserved.
Copyright 2022-2024 Advanced Micro Devices, Inc. All Rights Reserved.
Vivado Simulator v2024.2.0
Vivado Simulator v2024.2.0
Vivado Simulator v2024.2.0
Vivado Simulator v2024.2.0
Copyright 1986-2024 Xilinx, Inc. All Rights Reserved.
Visual Studio Code
- Install Visual Studio Code from:
https://code.visualstudio.com/ - Open the project folder in VS Code.
-
Install the following tools and extensions:
-
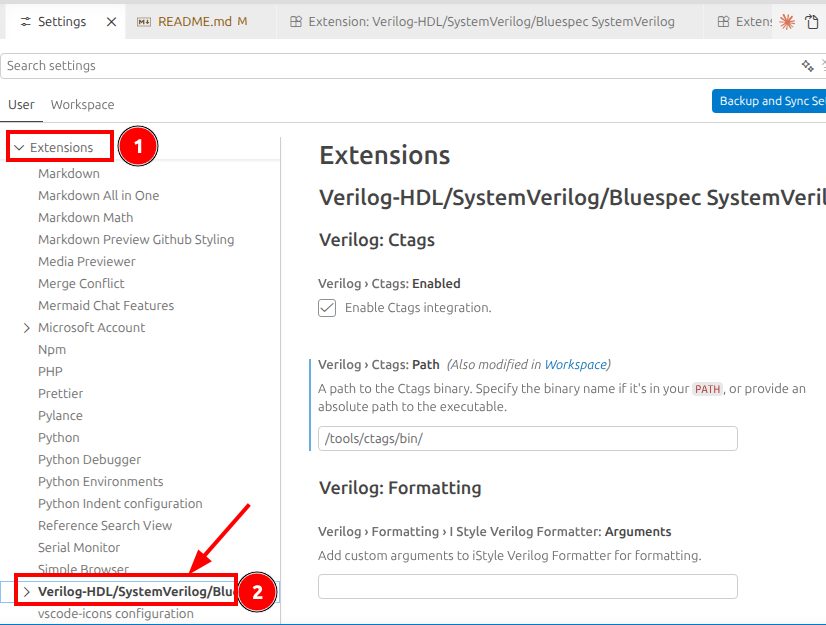
Verilog-HDL/SystemVerilog/Bluespec SystemVerilog
This extension provides editing support for Verilog / SystemVerilog / Bluespec files: syntax highlighting, code folding, and file-type detection. It also integrates with external tools via VS Code tasks (simulators/linters like Verilator, Icarus, ModelSim/Vivado) for build, lint, and simulation runs.

Figure 1: Verilog-HDL/SystemVerilog/Bluespec SystemVerilog Extension -
Ctags Companion
A VS Code companion for Universal CTags tag files: it reads a tags file and provides symbol navigation, tag search, and quick-jump features inside the editor.
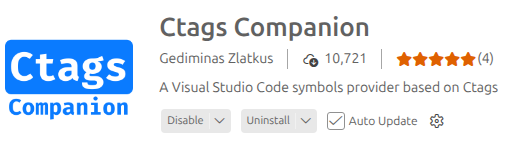
Figure 2: Ctags Companion Extension
-
GNU Make
A key part of this flow is the Makefile in scripts folder. It checks that required tools exist and then runs compile, elaborate, and simulate.
Make is a powerful build automation tool that can manage complex build processes with simple configuration. In this workflow, we use Make to orchestrate compilation, elaboration, and simulation steps with Vivado command-line tools.
Install GNU Make from:
- Linux:
sudo apt install make -
Windows: Get it from
https://gnuwin32.sourceforge.net/packages/make.htm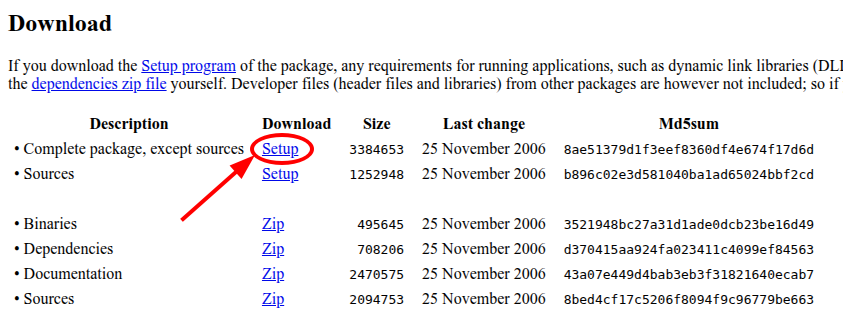
Figure 3: GNU Make Download After installation, add Make to your environment variables and verify:
make --versionYou should see output similar to:
 GNU Make 4.3
 Built for x86_64-pc-linux-gnu
This confirms that Make is installed and available in your PATH.
Universal CTags
Universal CTags generates tag files that allow editors like VS Code to provide features such as “Go To Definition” and symbol navigation. Install Universal CTags from:
- Linux:
sudo apt install universal-ctags -
Windows: Get it from
https://github.com/universal-ctags/ctags-win32/releases/tag/v6.1.0and Download the ctags-{version}-x64.zip (or x86 for 32-bit systems). Extract the contents to a folder (e.g., C:\Program Files\ctags) and add that folder to your system PATH.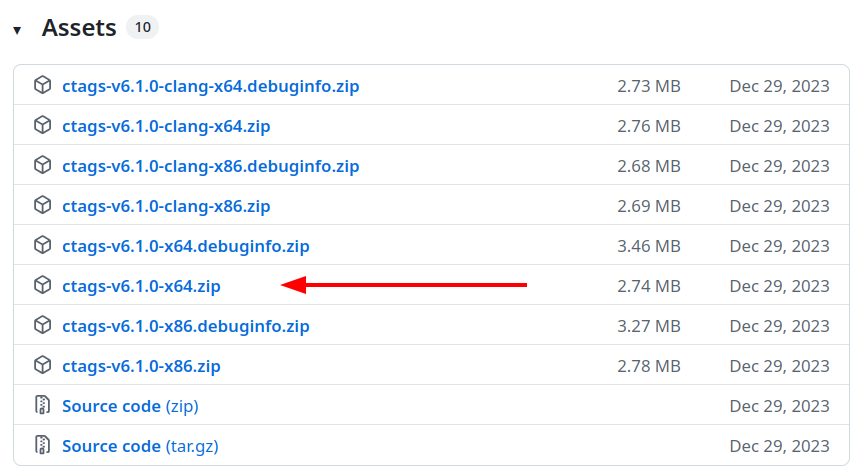
Figure 4: Universal CTags Download
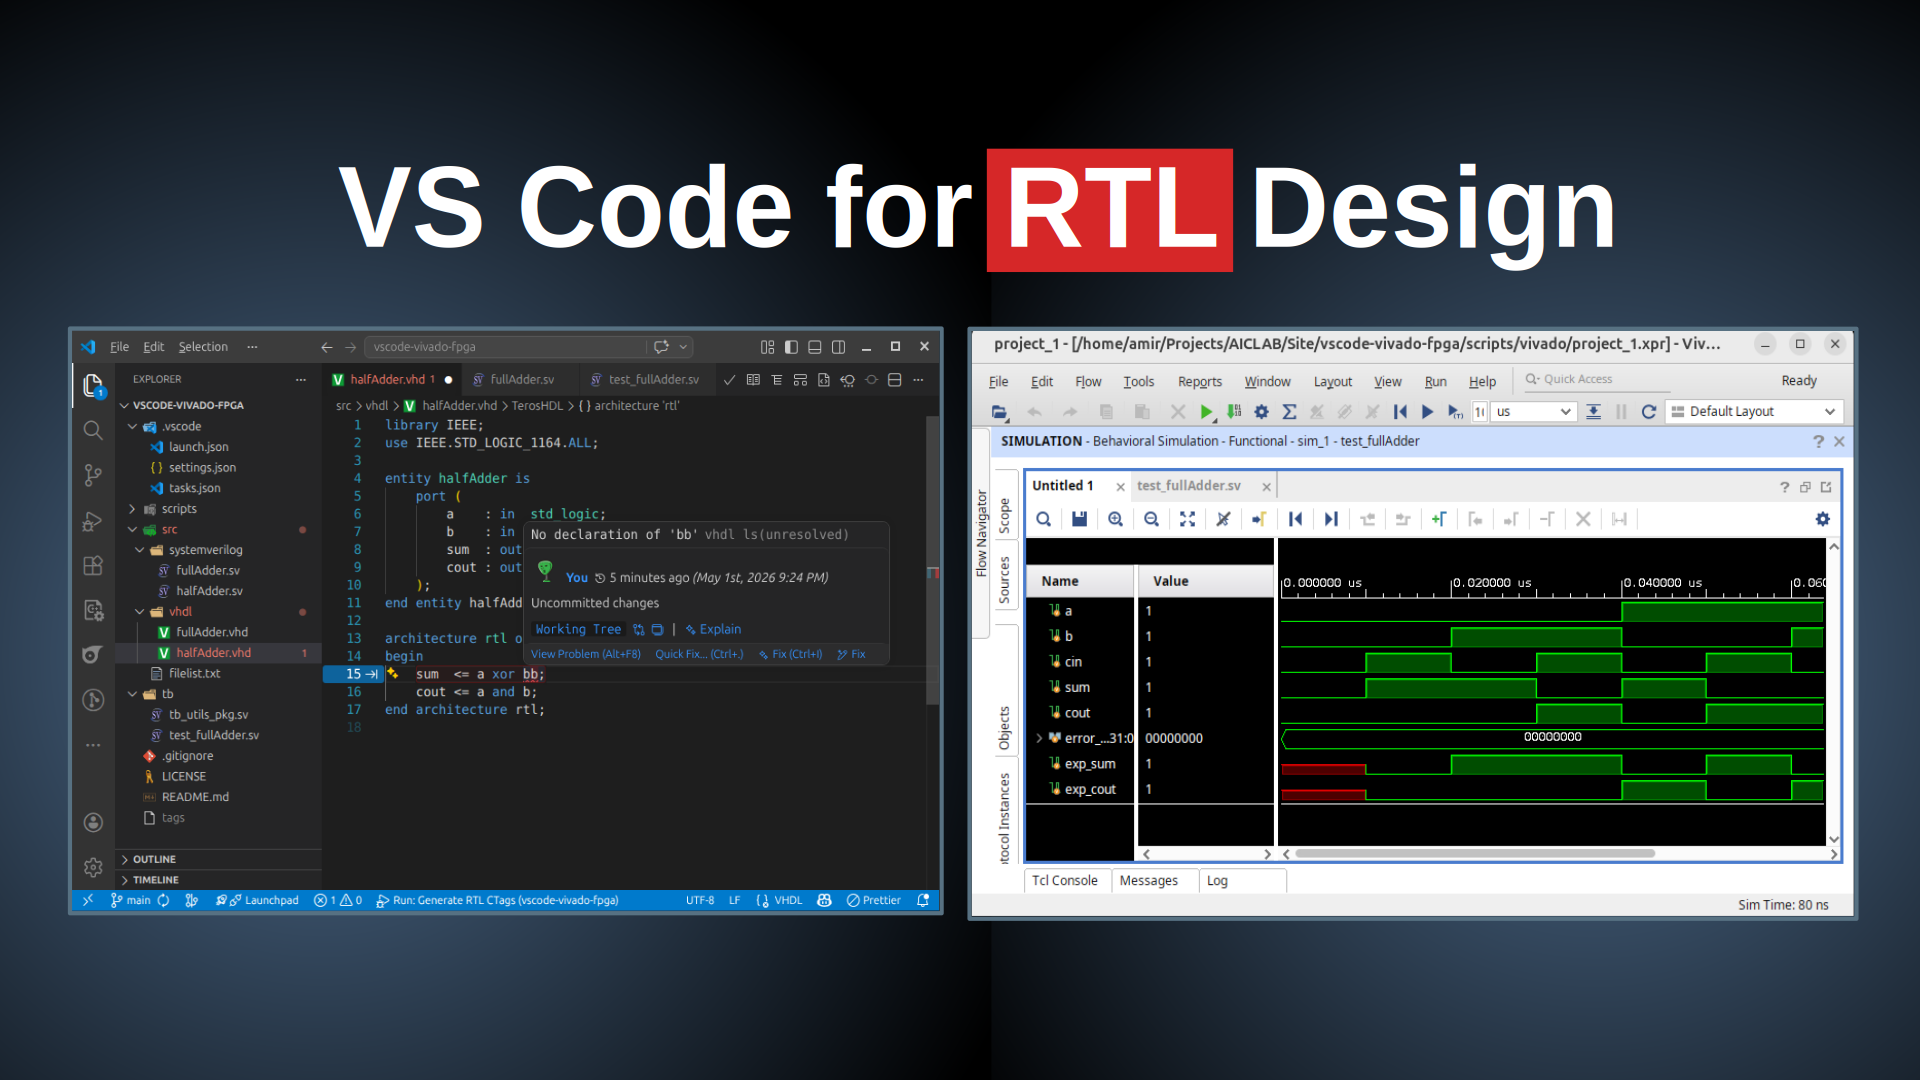
1) Real-Time Syntax Errors in VS Code
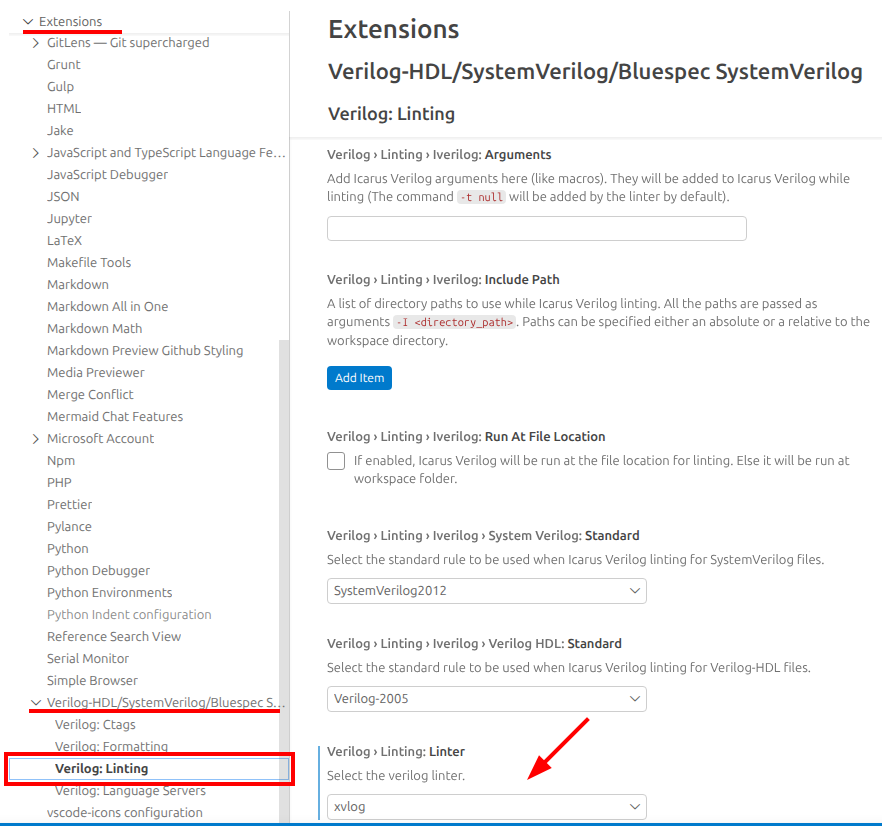
To get real-time syntax diagnostics while editing RTL, configure Verilog-HDL/SystemVerilog/Bluespec SystemVerilog extension to use Vivado xvlog for linting. For this, open the VS Code settings (Ctrl + ,) -> Extensions -> Verilog-HDL/SystemVerilog/Bluespec SystemVerilog, and configure the extension to use xvlog for linting. You can set the include path to your workspace folder to ensure it finds all your source files.
Workspace settings example (settings.json):
{
  "verilog.ctags.path": "/tools/ctags/bin/",
  "ctags-companion.command": "ctags --fields=+nKz --langmap=SystemVerilog:+.v.sv.svh --langmap=VHDL:+.vhd.vhdl --languages=SystemVerilog,VHDL -R .",
  "verilog.linting.xvlog.includePath": [
    "${workspaceFolder}"
  ],
  "verilog.linting.linter": "xvlog"
}
What these lint settings do: verilog.linting.linter selects Vivado xvlog as the checker, and verilog.linting.xvlog.includePath tells the linter where to resolve imports/includes while you edit. If include paths are missing, the editor may report false “not found” errors even when your RTL is valid.
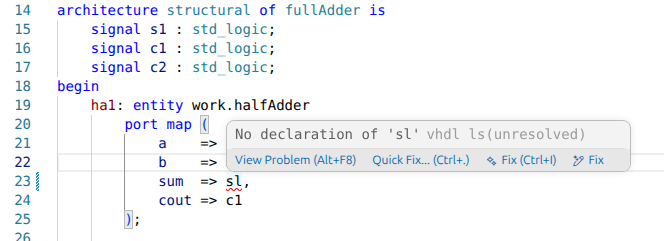
With this setup, syntax issues are reported directly in the editor as you type. For example, in the following code snippet, we typed sl instead of s1, and the editor immediately shows the syntax error: ‘No declaration of “sl”.’
2) Enable Go To Definition (F12)
To enable reliable symbol navigation in mixed RTL code, use the configured CTags command to generate tags.
In this project, a VS Code task is already defined:
- Task name: Generate RTL CTags
- Command:
ctags --fields=+nKz --langmap=SystemVerilog:+.v.sv.svh --langmap=VHDL:+.vhd.vhdl --languages=SystemVerilog,VHDL -R .
This ctags command is what the Ctags Companion extension runs to build a tags file for the workspace so VS Code can provide cross-file symbol navigation. In short: --fields=+nKz asks Universal CTags to include extra metadata (such as line numbers and tag kinds) with each tag; the --langmap entries ensure files with extensions like .v, .sv, .svh are treated as SystemVerilog and .vhd, .vhdl as VHDL; --languages=SystemVerilog,VHDL restricts parsing to those languages; and -R . tells ctags to recurse the current directory. Run this task after changing sources to refresh Go‑To‑Definition (F12) and other tag-based navigation features.
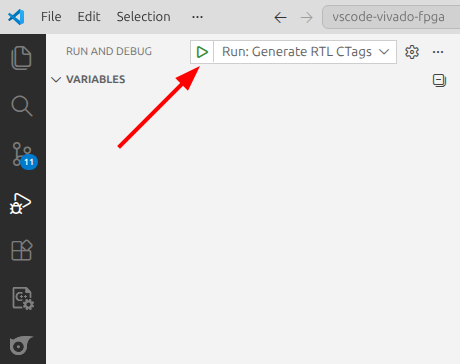
How to run it:
- Open Run and Debug tab.
- Select Generate RTL CTags.
- Click the green play button.
After tags are generated, use F12 to jump to symbol definitions across SystemVerilog and VHDL files.
3) Run Simulation from Makefile
The Makefile-based flow is language-aware and organized by filelists:
- scripts/filelist_vhdl.f for VHDL sources
- scripts/filelist_sv.f for RTL SystemVerilog/Verilog
- scripts/filelist_tb.f for testbench files
From the scripts folder:
make all
The output will be similar to:
~/vscode-vivado-fpga/scripts$ make all
##### CHECKING TOOLCHAIN #####
##### COMPILING VHDL Files #####
##### COMPILING SystemVerilog RTL Files #####
##### COMPILING Testbench Files #####
##### ELABORATING #####
##### RUNNING SIMULATION #####
Starting Full Adder tests...
Test passed: a=0, b=0, cin=0, sum=0, cout=0
Test passed: a=0, b=0, cin=1, sum=1, cout=0
Test passed: a=0, b=1, cin=0, sum=1, cout=0
Test passed: a=0, b=1, cin=1, sum=0, cout=1
Test passed: a=1, b=0, cin=0, sum=1, cout=0
Test passed: a=1, b=0, cin=1, sum=0, cout=1
Test passed: a=1, b=1, cin=0, sum=0, cout=1
Test passed: a=1, b=1, cin=1, sum=1, cout=1

All tests passed!
$finish called at time : 80 ns : File "/vscode-vivado-fpga/tb/test_fullAdder.sv" Line 52
What make all does:
- Checks toolchain availability.
- Compiles VHDL with xvhdl.
- Compiles RTL with xvlog.
- Compiles testbench with xvlog.
- Elaborates with xelab.
- Runs simulation with xsim.
Practical note: this flow separates sources by file list, which makes debug much easier. If a build fails, first identify which stage failed (VHDL compile, RTL compile, testbench compile, elaborate, or run), then inspect the corresponding file list to quickly isolate ordering or missing-file issues.
To open waveform view:
make wave
This runs the same flow but also opens the Vivado waveform viewer with the generated .wcfg file, allowing you to inspect signal waveforms after simulation.
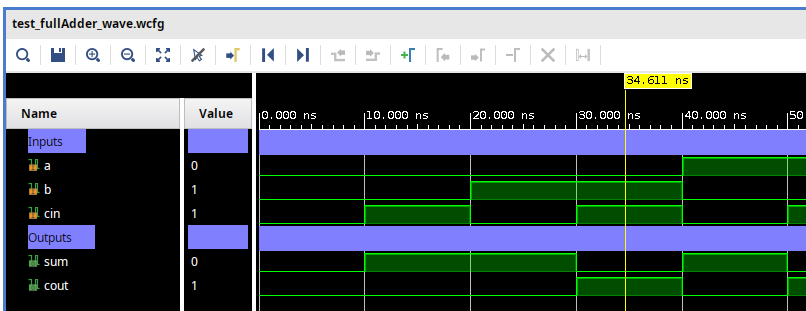
This provides a repeatable local simulation flow without opening Vivado GUI for every run.
4) Create Vivado Project from Tcl
Once code and simulation are ready, create a Vivado project from Tcl:
- Open Vivado.
- Go to Tools -> Run Tcl Script…
- Select scripts/create_project.tcl
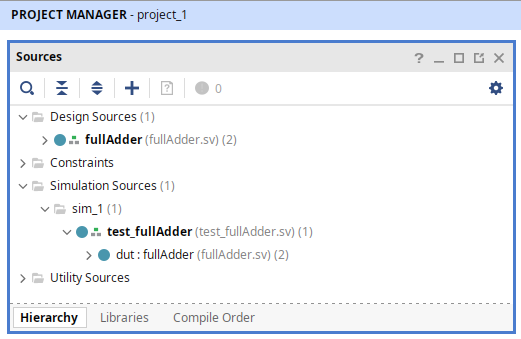
The script reads all three file lists, adds source and simulation files, sets the top modules, and updates the compile order.
Why this matters: creating the Vivado project from Tcl keeps the GUI project reproducible. Instead of manually adding files in the UI every time, you regenerate the same project from the same file lists, which reduces human error and keeps local and team setups consistent.
Success confirmation in Tcl console:
Project created successfully!
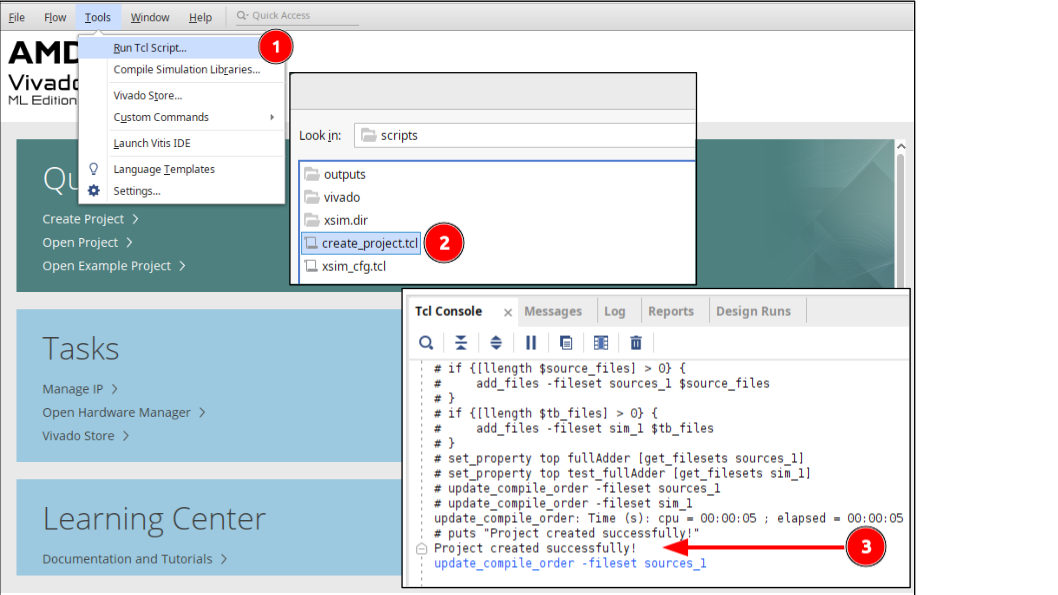
This keeps your GUI project aligned with the same source-of-truth filelists used by Make.
GitHub Repository:
https://github.com/aiclab-official/vscode-vivado-fpga