SV19. Run C Code on a Custom RISC-V CPU: Fibonacci from Compiler to FPGA

If you designed your own RISC-V CPU and want to open-source it, one of the best first blog topics is:
“How to run C code on your custom RISC-V processor, end-to-end.”
In this post, we use the TRIX-V SoC and run a Fibonacci C program all the way from compilation to simulation and FPGA output.
Table of Contents
- Table of Contents
- Run C Code: Calculate the Fibonacci Number
- Step 1: Compile C to RISC-V Assembly (Godbolt)
- Step 2: Convert Assembly to Machine Code
- Step 3: Load Program into TRIX-V Instruction Memory
- Step 4: Run Simulation
- Step 5: Run Fibonacci on FPGA
- References
Run C Code: Calculate the Fibonacci Number
In this section, we run a Fibonacci program on the TRIX-V SoC.
Fibonacci Definition
The Fibonacci sequence is defined as:
F(0) = 0F(1) = 1F(n) = F(n-1) + F(n-2)forn > 1
Our program calculates the nth Fibonacci number iteratively and writes intermediate values to address 0x400.
0x400 is the UART TX register in this system. Writing to this address pushes data into the UART FIFO, then the UART transmits it.
C Program
#include <stdint.h>

int main() {
    volatile uint32_t *ptr = (volatile uint32_t *)0x400;

    int n = 40; // Change this value to test

    int a = 0;
    int b = 1;
    int temp;

    for (int i = 0; i < n; i++) {
        temp = a + b;
        a = b;
        b = temp;
        *ptr = a;
    }

    while (1);
    // a: nth Fibonacci number
}
Expected behavior: after execution, the Fibonacci result sequence is written through UART, and for n = 40, the expected final value is 102334155.
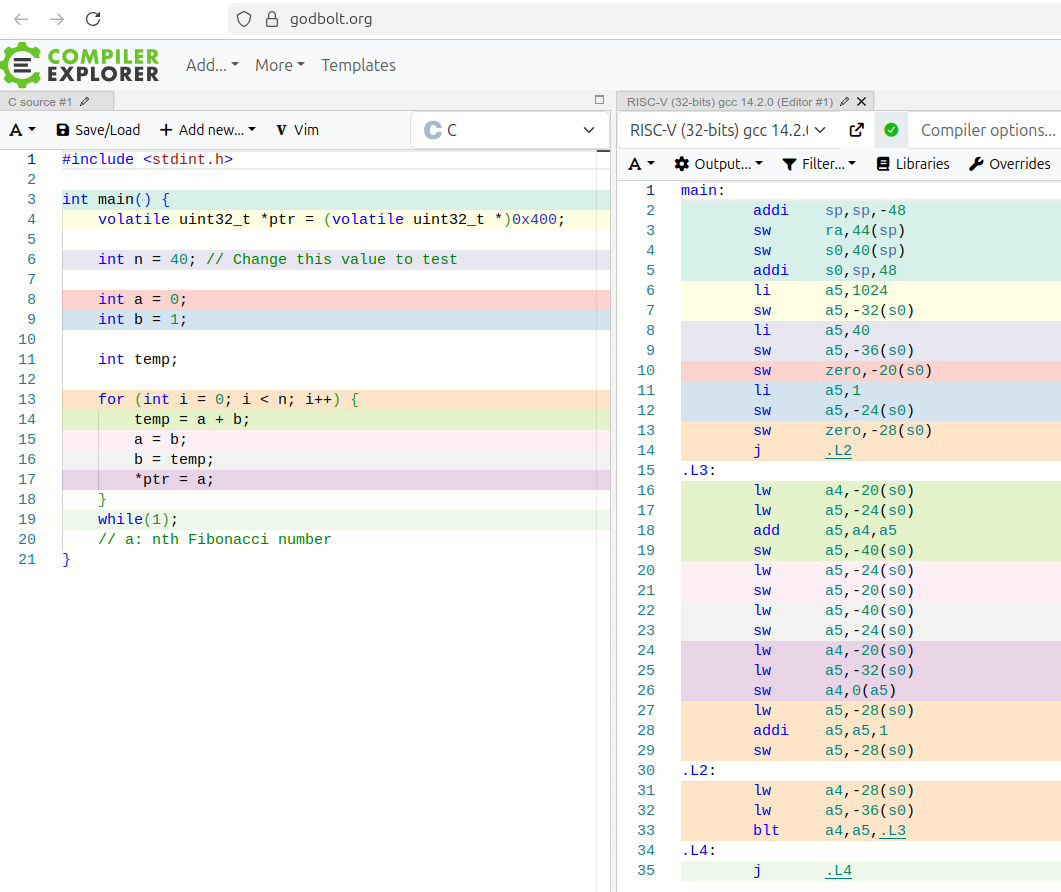
Step 1: Compile C to RISC-V Assembly (Godbolt)
Use Godbolt Compiler Explorer to generate RISC-V assembly from the C code. Godbolt is an online tool that compiles code and shows the resulting assembly instructions.
- Paste the Fibonacci C code into Godbolt.
- Select a RISC-V 32-bit GCC target.
- Compile and inspect the assembly output.
In this flow, we use RISC-V (32-bits) gcc 14.2.0.
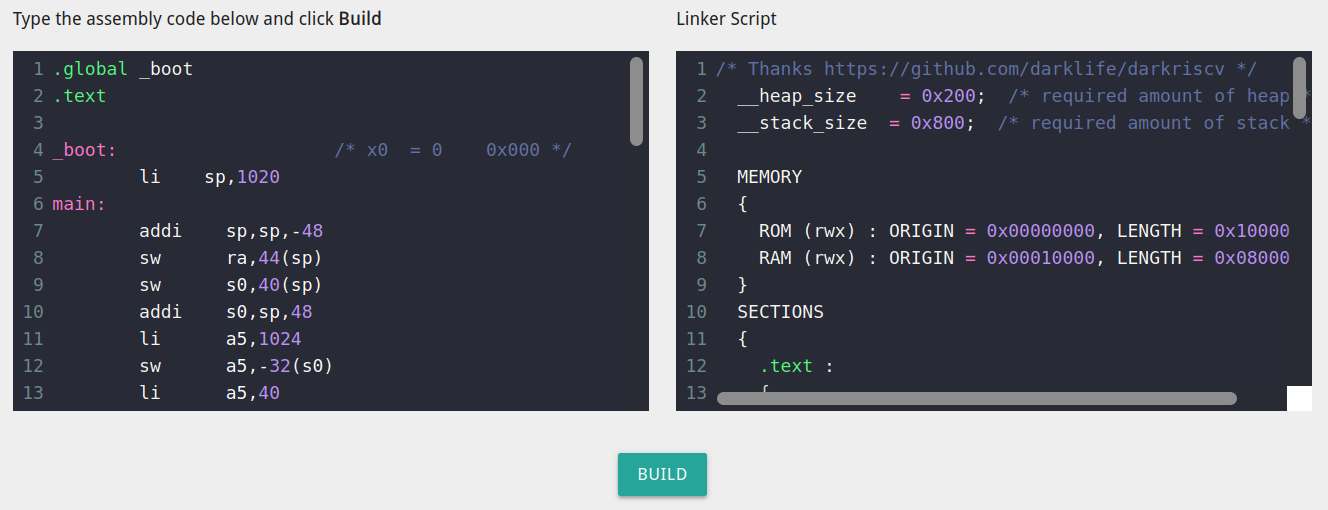
Step 2: Convert Assembly to Machine Code
Use the online assembler: riscvasm.lucasteske.dev
- Copy the generated assembly from Godbolt.
- Paste it into the assembler input.
- Add stack pointer initialization:
li sp, 1020This sets
spto the last data memory address (255 * 4 = 1020). In this case, data memory is 256 words (1024 bytes), so the stack starts at the end of this region. - Click Build.
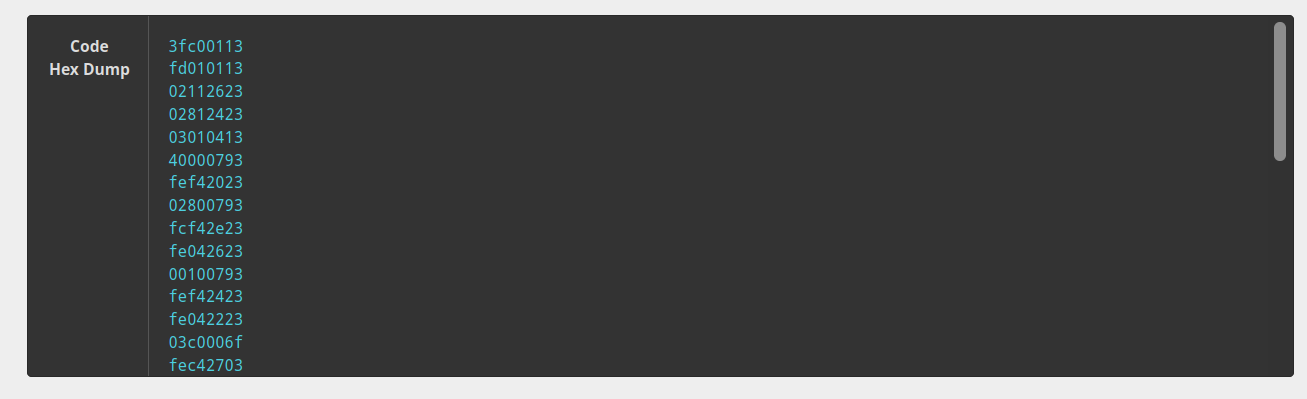
- Copy the generated machine code (hex instructions).
Step 3: Load Program into TRIX-V Instruction Memory
Copy the generated machine code into your instruction memory initialization file, for example:
tb/trixv.imem
This file is used to preload program instructions before simulation starts.
Step 4: Run Simulation
You can run the Fibonacci test in two common ways. First, change to the scripts directory:
cd scripts
If you run with a Makefile, run the following command in the terminal:
make simulate
If you run with Vivado, create a Vivado prjoct: Run the following command in the terminal:
vivado -mode batch -source src/create_project.tcl
Or open Vivado GUI, from Tools menu select run Tcl script... and select the provided script create_project.tcl. Then Run simulation:
- Click
Restart simulation. - Click
Run all.
Reference Terminal Output:
# run 1000ns
Starting Fibonacci test...
INFO: [USF-XSim-96] XSim completed. Design snapshot 'test_trixv_mc_fibo_behav' loaded.
INFO: [USF-XSim-97] XSim simulation ran for 1000ns
launch_simulation: Time (s): cpu = 00:00:09 ; elapsed = 00:00:10 . Memory (MB): peak = 7988.883 ; gain = 20.613 ; free physical = 11296 ; free virtual = 29221
restart
INFO: [Wavedata 42-604] Simulation restarted
run all
Starting Fibonacci test...
Test Passed: dmem[250] = 102334155 (Expected: 102334155)

[1;32m
*************************************************
*   _______     _       ______    ______   _    *
*  |_   __ \   / \    .' ____ \ .' ____ \ | |   *
*    | |__) | / _ \   | (___ \_|| (___ \_|| |   *
*    |  ___/ / ___ \   _.____`.  _.____`. | |   *
*   _| |_  _/ /   \ \_| \____) || \____) ||_|   *
*  |_____||____| |____|\______.' \______.'(_)   *
*                                               *
*************************************************
[0m
All tests passed!
$finish called at time : 1060020 ns : File "tb/test_trixv_mc_fibo.sv" Line 76
Step 5: Run Fibonacci on FPGA
The constraints file is set for Digilent Nexys Video (Artix-7 XC7A200T):
constraints/nexys_video.xdc
If you use a different board, update constraints accordingly.
Instruction memory is initialized in src/top_trixv_mc.sv using:
parameter IMEM_INIT_FILE = "trixv.imem"
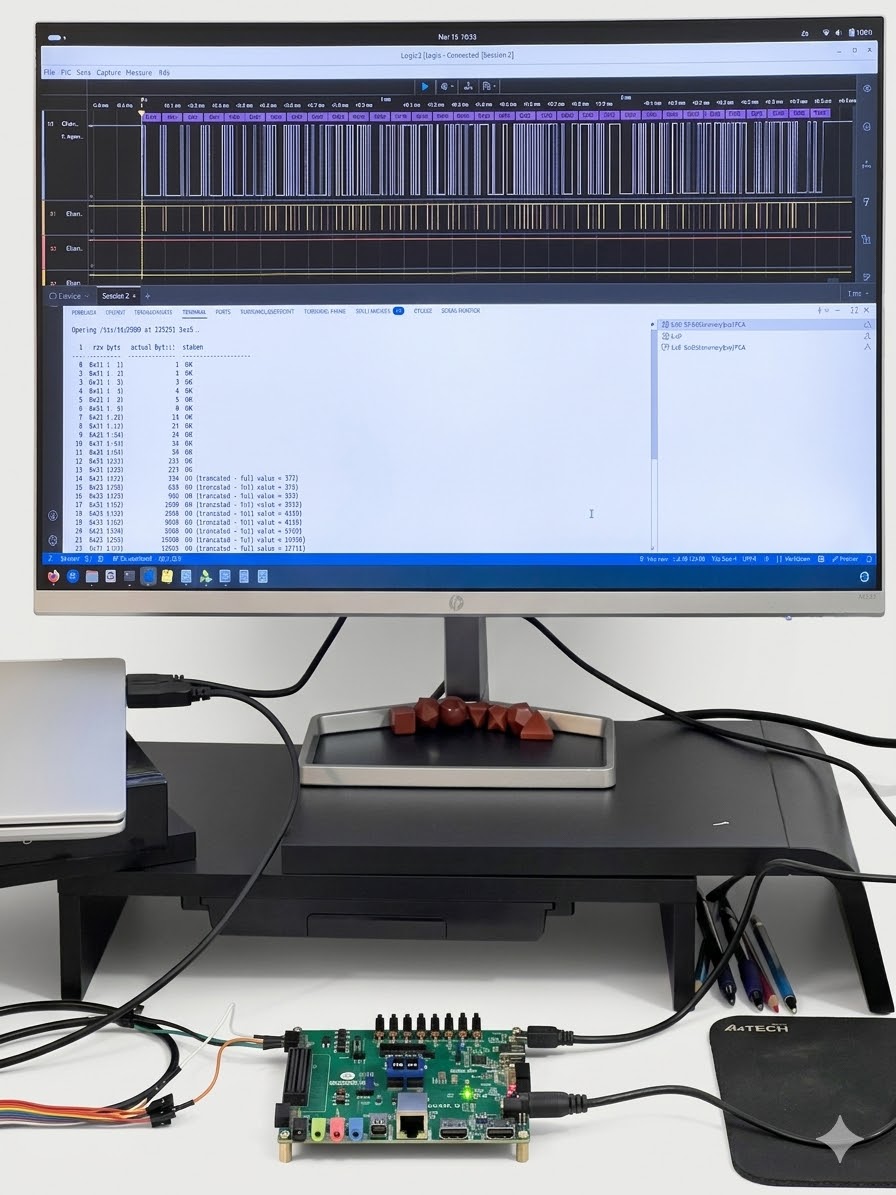
You need a USB-to-TTL Serial Cable to connect the FPGA UART pins to your computer. Connect the adapter’s RX pin to the FPGA’s UART TX pin (defined in constraints) and GND to GND.

After programming the FPGA:
- Open a serial terminal (PuTTY, CuteCom, etc.).
- Set the correct COM port and baud rate (
115200). - Observe Fibonacci output bytes from UART.
You can also use scripts/read_fibo.py python script.
This Python script reads raw Fibonacci bytes from TRIX-V UART and prints annotated decimal values.
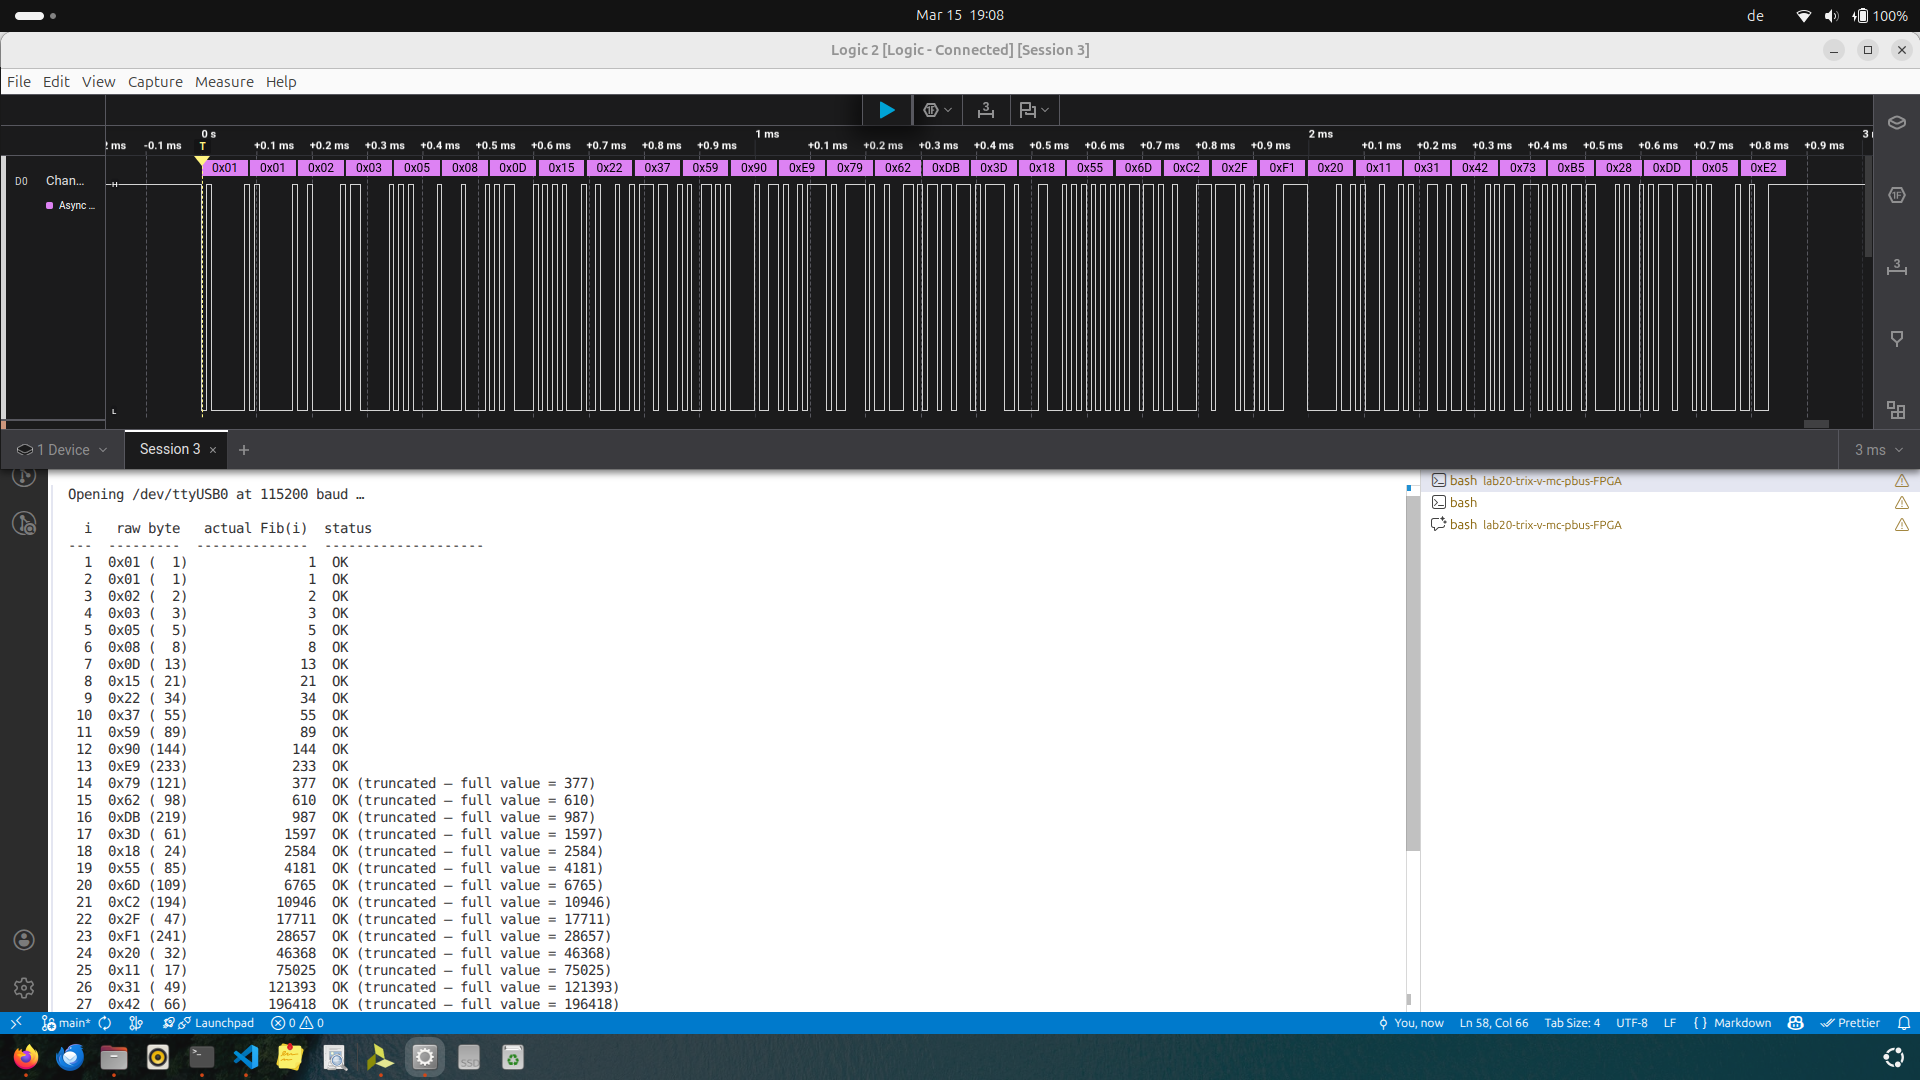
This confirms the TRIX-V SoC computes Fibonacci correctly and that CPU, memory, and UART all operate correctly on real hardware.